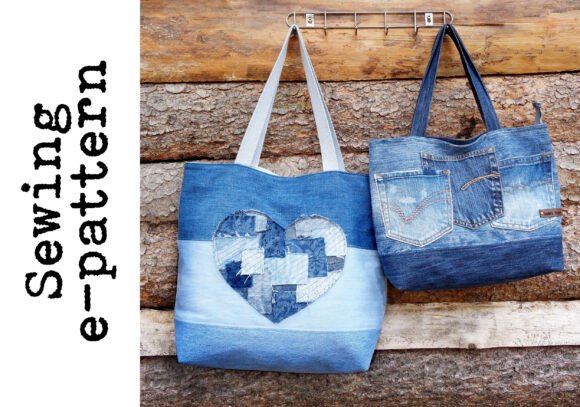
How to Make a Classic Tote Bag with Closure: A Beginner-Friendly Sewing Tutorial
Making your own tote bag is an excellent way to blend creativity, practicality, and sustainability into one fun project. Whether you're new to sewing or looking for a simple yet stylish handbag pattern, the classic tote bag with closure is a perfect choice. This DIY project not only allows you to create something useful but also gives you the freedom to personalize it. In this article, we’ll explore everything you need to know about making a tote bag with closure, from its purpose and significance to how you can customize yours using downloadable PDF patterns.
Why Choose a Tote Bag with Closure?
A tote bag is more than just a convenient carry-all; it's a versatile accessory that fits seamlessly into modern life. From school supplies to grocery shopping, a well-designed tote can handle it all. But what makes a tote bag with closure stand out is its ability to keep your belongings secure. Unlike open-topped totes, which are great for quick access, closed totes offer extra protection against spills, theft, and messiness — especially when you’re carrying valuables or delicate items.
- Security: The closure mechanism keeps your items in place and adds a layer of privacy.
- Style: Zippers, buttons, or magnetic closures can elevate the look of your bag.
- Customization: You can choose fabrics, colors, and designs to match your personality or needs.
The Benefits of a Lined Tote Bag
Including a lining in your tote bag adds both durability and elegance. A lined interior prevents wear and tear on the outer fabric, especially if you're using a delicate material like cotton or linen. It also gives your bag a finished look from the inside, which is particularly important if you plan to display your work or give it as a gift. Plus, the lining can hide any stitching mistakes, giving your bag a cleaner appearance overall.
What Makes This Pattern Unique?
This particular DIY classic tote bag pattern is designed with beginners in mind. It eliminates the need for interfacing, which is a common requirement in many tote bag tutorials. Without the hassle of pressing or cutting additional materials, you can focus on mastering the basics of bag construction. The pattern includes clear, step-by-step instructions and high-quality photos to guide you through each stage of the process.
Once purchased, you'll receive four PDF files instantly via email, so you can start crafting right away. These include:
- Instructions (15 pages): Follow these detailed, illustrated steps without needing to print them — simply use them on screen while working.
- Pattern for Large Tote: Printable at exact size for a spacious design ideal for daily use.
- Pattern for Small Tote: Compact and lightweight, great for outings or storing essentials.
- Handles: Print this file if you want to craft custom handles instead of using pre-made ones.
Getting Started: Materials and Tools
To begin your tote bag journey, gather the following materials:
- Outer fabric (cotton, canvas, denim, etc.)
- Lining fabric (lightweight cotton or quilting cotton)
- Closure components (zipper, button, or snap)
- Thread matching your fabric colors
- Sewing machine or needle for hand-sewing
- Pins or clips
- Scissors
- Ruler and pencil for marking
While the tutorial doesn't require interfacing, you may still choose to add some for extra structure, depending on your fabric choice and personal preference. The beauty of this pattern lies in its flexibility — you can adapt it to suit your style and skill level.
Step-by-Step Guide to Making Your Tote Bag
Follow along with the easy-to-use instructions provided in the downloadable PDFs. Here’s a simplified overview to help you get started:
- Print and assemble the pattern pieces: Depending on whether you want a large or small tote, print the corresponding pattern and follow the instructions to join the pages accurately.
- Cut your fabric: Using the assembled pattern, cut two pieces of outer fabric and two pieces of lining fabric. Be sure to leave enough seam allowance around the edges.
- Attach the closure: For zippers, sew the top edge first before assembling the rest of the bag. If using buttons or snaps, wait until the final stages to install them.
- Stitch the sides and bottom: With right sides together, sew the side seams and bottom of the outer fabric pieces. Repeat the same for the lining fabric.
- Insert the closure: Carefully attach the zipper or other closure to the top opening of the bag. This is a crucial step, so take your time to ensure accuracy.
- Turn the lining inside out and insert it into the outer bag: Match the corners and sew around the base to secure the lining in place.
- Finish the top edge: Depending on your chosen closure method, fold the top edge over and sew it down, ensuring the closure remains functional and smooth.
- Attach the handles: Either use the printed handle pattern or go with ready-made handles. Secure them evenly to the sides of the bag.
Each step is accompanied by clear visuals in the downloadable tutorial, making it easy to follow even for those who are new to sewing. The instructions are written in English and formatted for A4 paper, so printing isn’t necessary unless you prefer a physical copy for reference.
Customizing Your Tote Bag: Let Your Creativity Shine
One of the most exciting parts of this project is the opportunity to personalize your tote bag. As mentioned earlier, the blank canvas nature of this design invites endless possibilities:
- Drawing or painting: Use fabric markers or paints to create unique artwork directly on the bag.
- Applique: Add embroidered patches or applique shapes for a decorative touch.
- Stencil work: Apply stencils to create repeating patterns or lettering.
- Stripes or patchwork: Mix and match fabric scraps for a colorful, handmade look.
Some examples of customization styles are included in the tutorial, but feel free to let your imagination lead the way. A tote bag with closure becomes even more special when it reflects your individual taste and creativity.
Printing Tips for Apple Users
If you're using an Apple device, there’s an important note regarding printing the patterns. Avoid using the Preview app, as it may scale the pages incorrectly. Instead, use Adobe Acrobat Reader for accurate printing. This ensures the patterns maintain their correct measurements, which is essential for a properly fitting bag. Once you’ve downloaded the files, they will be sent to your email immediately after payment. Don’t forget to check your spam folder!
Practical Applications and Relevance Today
Tote bags have become a staple in today’s fashion and lifestyle due to their eco-friendly nature and versatility. By making your own classic tote bag with closure, you contribute to reducing plastic waste and support sustainable living. These bags are also incredibly useful in various scenarios:
- Education: Carry books, notebooks, and art supplies without damaging them.
- Business: Use a professional-looking tote for meetings or conferences.
- Travel: A spacious tote with closure is perfect for carrying toiletries or electronics securely.
- Everyday use: Ideal for groceries, gym gear, or casual outings.
With the rise of remote work and hybrid lifestyles, having a reliable and customizable tote has never been more relevant. It's a project that bridges the gap between functionality and personal expression.
Common Misconceptions About Tote Bags
Many people believe that creating a tote bag requires advanced sewing skills. However, this easy to follow sewing tutorial for beginners proves otherwise. Even if you've never used a sewing machine before, the clear guidance and straightforward techniques make this project accessible to all skill levels.
Another misconception is that tote bags lack structural integrity. While it's true that not all totes are sturdy, using the right fabric — such as canvas or denim — combined with proper reinforcement at the bottom, ensures your bag can hold heavy items comfortably.
Enhancing Your Skills Through Practice
Creating a tote bag is a great way to build confidence in your sewing abilities. As you progress, you might consider experimenting with different closures, adding pockets, or even trying out quilted designs. Each variation helps sharpen your skills and expand your creative repertoire. This project serves as a stepping stone toward more complex sewing tasks, such as making backpacks, purses, or crossbody bags.
Conclusion: Embrace the Joy of Crafting
Making a classic tote bag with closure is more than just a practical endeavor — it's a fulfilling experience that encourages self-expression and resourcefulness. Whether you're doing it for yourself or gifting it to someone else, the result is a beautiful, handcrafted item that you can proudly show off. The downloadable tutorial offers everything you need to succeed, including printable patterns and visual guidance tailored for ease of use.
So why not start today? With just a few basic tools and some imagination, you can transform simple fabric into a stylish and functional piece of everyday life. Happy sewing!